Planning is one of the essential parts of home improvement, but this can be especially tricky when working with a small space like the bathroom vanity countertop.
You want to ensure that you don’t waste your money on unnecessary materials and tools, but you also don’t want to cut corners that will cost you more money and time in the long run.
Here are some tips on how to glue sink to vanity so that your new countertop (and sink) will be as beautiful and functional as possible!
Read More: How Do You Attach An Undermount Sink to Granite?
How to Glue Sink to Vanity?
Before you begin
1. Turn off the water, drain and unplug sink. This will give you a good hour or so before it cools down and becomes a mess again.
2. Disconnect plumbing supply lines if needed (usually where they go under the counter)
3. Remove any baseboard molding in the way that might get damaged
4. Take out the screws from under your sink that is holding it to your cabinet.
Materials required
Before you begin, there are a few things you’re going to need to do this project successfully. The first thing you’ll need is a 12-inch bar clamp that detaches. The second thing you’re going to need is the adhesive.
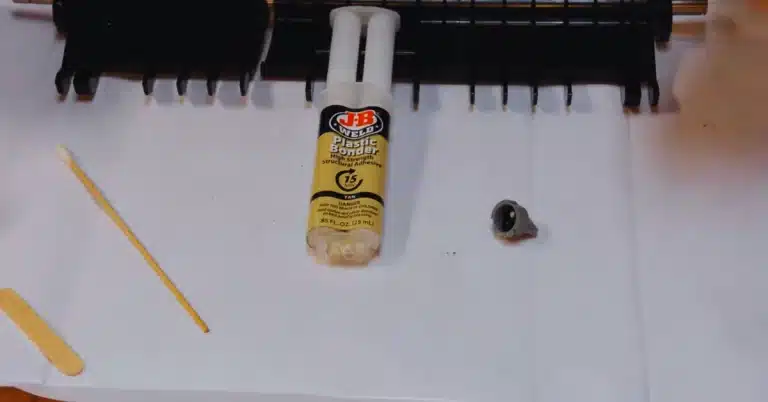
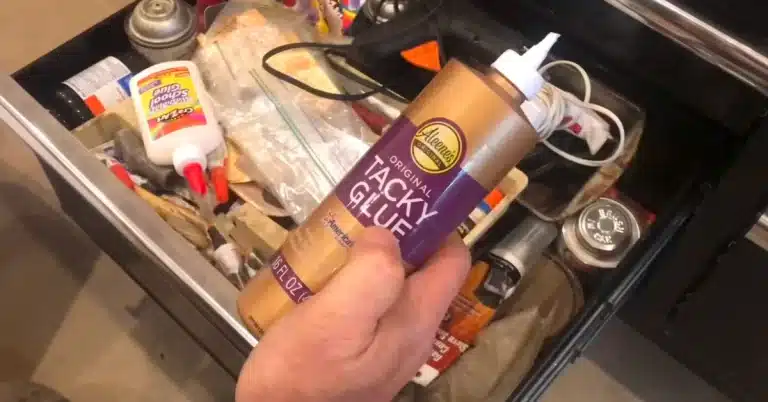
There are two main options here. The first is liquid nails for granite and marble. This is available at Amazon, home depot, or lowes. Be sure to follow the manufacturer’s guidelines for drying times on this.
The second adhesive option is a two-part epoxy. This is not as commonly available to the public, but it is what we use here in the shop. This consists of resin and a hardener. The drying time on this is roughly half an hour.
Another thing you’re going to need is acetone or Rubbing alcohol. This cleans all the surfaces and gives the glue a good surface to bond to.
The last thing you’ll need is a 2×4 wood slab to brace the sink up underneath the slab while it’s drying, the most important step.
This entire process is making sure that your slab is completely supported. We’ve used two sawhorses and a sheet of plywood that we’ve cut a rectangle out of; this will provide support for the Entire slab throughout the gluing process.
Application process
First thing you have to clean everything. The slab’s underside wants to ensure you get all the loose dirt from underneath. Next, it makes the glue for one sink about that.
Much glue will do just fine, and then you want to add your hardener to about one-tenth of the resin you used. You want to ensure you mix these two well and just one consistent color. You can start spreading when it’s all mixed after it’s mixed. You want to scrape off just a little bit like that.
So you have a nice steady beat along your scraper and then set it on the speck, and as you’re coming across, slowly move it down. You get a steady bead like that.
All the way around, you have to make sure you keep your glue on the farthest edge possible; you don’t want to Glue seeping into the inside of the sink here. Now we have your bead set, there are no gaps in between you, and make sure it’s consistent.
All the way around, make sure your sink is oriented properly. Take your bar clamp slide, the long end through the bottom, the edge at the top, and then bring your sink right up.
Keeping your eye on the back of the sink, make sure that the back lines up with The edge of the sink there; tighten it down just a little bit, not all the way, though you want to leave it a little bit loose.
So you can make your adjustments. Just do this by my feeling when you have to ensure an even lip around your sink. You don’t want to go too far back because you obstruct the face.
Whole here takes a little bit of plane to get it perfect. Once your sink is in position, you can tighten down the clamp the rest of the way.
Now, if you have a little glue coming through on the side, we do here.
Take your acetone: By using rubbing alcohol, clean that off before it dries, double-checking looks good last up is underneath. You’re going to have some Beating. It’s best to smooth it out with your fingers to get that epoxy in all the crevices here; make sure you go up to where your vanity meets so that seal is complete.
Tips and tricks
- Cover the sink drain area with silicone sealant and wait five minutes.
- Put the new sink in position, ensuring it fits securely onto the top.
- Now attach the new sink firmly on both sides at once.
- If there is too much gap between the wall and the sink, you can use caulk or silicone sealant around this perimeter.
Can you glue down a sink?
You can glue down a sink using a strong adhesive, but it’s not the most recommended method for all sinks.
Using a strong adhesive like epoxy or construction adhesive could possibly hold a lightweight sink in place.
However, this is not an ideal or long-lasting solution, and it’s not advisable for heavy sinks like those made from stone or cast iron.
Here’s a more convenient way to install a sink:
Undermount sinks: These are mounted underneath the countertop. The countertop (usually made of a solid surface like granite, quartz, or marble) has a hole cut out to fit the sink.
The sink is then glued and clamped to the underside of the countertop using a special adhesive, usually a two-part epoxy or silicone. This method provides a sleek look and makes cleaning the countertop easier.
Drop-in sinks: Also known as top-mount or self-rimming sinks, these are designed to be dropped into a hole cut out of the countertop. They have a rim that sits on top of the counter.
Once the sink is dropped in, it’s sealed around the edges with a bead of silicone caulk to prevent water from seeping underneath.
Vessel sinks: These sit on top of the countertop, like a large bowl. They’re attached with a mounting ring or directly through the drain hole, and then the edges are sealed with silicone.
It’s always best to follow the sink manufacturer’s instructions for installation to ensure it’s secure and waterproof. Hiring a professional plumber is a good idea if you’re uncomfortable doing this kind of work.
How do you secure a sink to a vanity?
To secure a sink to a vanity, start by preparing the vanity. Set it in its place and mark where the sink will go.
If you’re installing a drop-in sink, you need to create a cut-out in the countertop to accommodate it. Apply a bead of silicone caulk around the edge of the hole, drop the sink in, and apply pressure to create a seal.
For an undermount sink, position it under the countertop and secure it with mounting clips as instructed by the manufacturer. Then, caulk around the edge of the countertop where it meets the sink to prevent water from getting underneath.
For a vessel sink, you place it over the drain hole and install the drain according to the manufacturer’s instructions. After placing the sink, seal around the sink’s base and faucet with silicone to prevent leaks.
Once your sink is secured to the vanity, connect your plumbing. Attach the drain assembly, including the p-trap, then connect your water supply lines to the faucet. Make sure to check all connections for leaks.
Always follow the specific instructions provided by the sink and vanity manufacturer. If you’re not comfortable with this type of work, hiring a professional plumber is always a good option.
Last Opinion
In conclusion, using a professional installer to glue the sink may be the best way to ensure a successful glue-up.
Alternatively, silicone is an easy and inexpensive option that will provide years of reliable performance. Whichever you choose, make sure that you have the correct adhesive before beginning.