When you break ceramic, it’s easy to be overwhelmed by the thought of trying to put it back together. Fortunately, there are several steps you can take to ensure that your beloved vase or mug looks excellent again in no time at all. It just takes some patience and attention to detail!
In this guide, we’ll show you how to glue ceramic back together using only household items and tools, so you can have your favorite pieces looking as good as new in no time!
Read More: Best Food-Safe Glue for Ceramics
What Are Ceramics?
Ceramics are inorganic and non-metallic materials that have been formed through the use of heat. They are typically hard and brittle, making them susceptible to breakage.
If your ceramic item has broken, don’t despair! With a little bit of glue and patience, you can fix it as well as new it. Here’s a step-by-step guide on how to do just that.
Read More: What Adhesive Sticks to Ceramic Tile?
How to Glue Ceramic Back Together?
The Basics
Ceramic glue is a type of glue that is used to adhere ceramic materials together. There are many different types of ceramic glue, but the most common type is ceramic epoxy.
This type of glue comprises two parts: a resin and a hardener. The resin is the part of the glue that bonds the two pieces of ceramic together, while the hardener helps to make the bond stronger and more durable.
Step 1: Gather Materials
To glue your ceramic back together, you will need the following materials: a clean, flat surface; ceramic glue/epoxy; a toothpick; and duct tape or clamps. Once you have gathered your materials, you are ready to move on to the next step.
Step 2: Prepare Surface
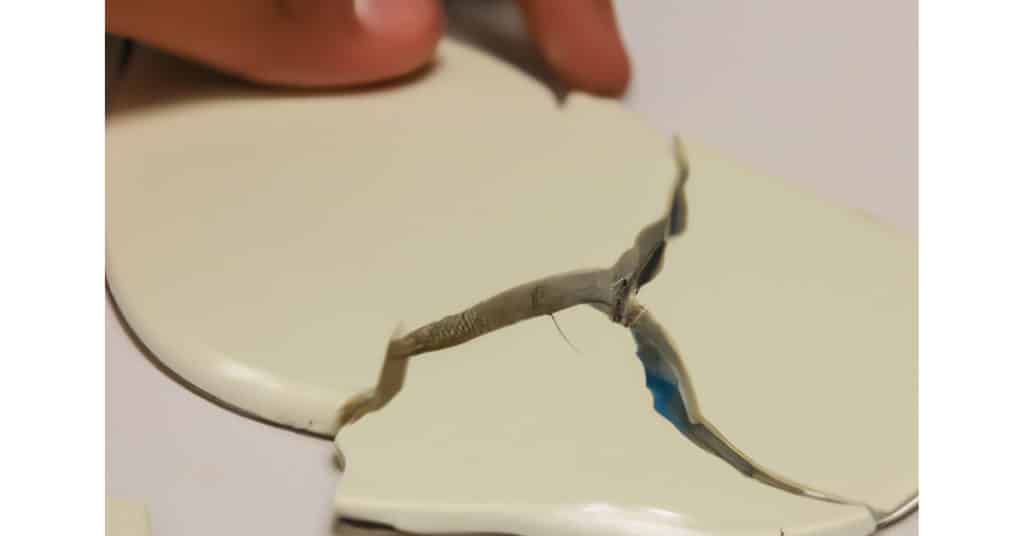
Once you have the two pieces of ceramic you want to glue back together, it’s time to prepare the surface. This step is crucial because it will determine how well the glue will adhere to the ceramic.
First, use fine-grit sandpaper to sand down the edges of both pieces. Then, wipe away any dust with a damp cloth.
Step 4: Mix Adhesive
You’ll need a two-part epoxy adhesive for this project. Begin by mixing the two parts according to the manufacturer’s instructions.
Once the glue is mixed, use a toothpick to apply it to the broken edges of the ceramic. Be sure to apply the adhesive evenly so that the pieces will adhere properly.
Step 5 – Attach Piece to Surface
You’re almost finished! The last step is to attach your newly glued piece to the surface. If the piece is small, you can hold it in place with your fingers.
You may need to use clamps or another support method for larger pieces. Give the glue time to dry completely before moving on.
Step 6 – Finishing Touches
Now that your ceramic piece is glued back together, it’s time for some finishing touches. Use fine-grit sandpaper to smooth out any rough edges where the glue is visible.
You can also use a wet sponge to lightly sand down the surface of the ceramic. If there are any holes or cracks in your piece, you can fill them in with epoxy putty.
Once you’re finished, your ceramic should look as good as new!
Can you glue ceramic pieces back together?
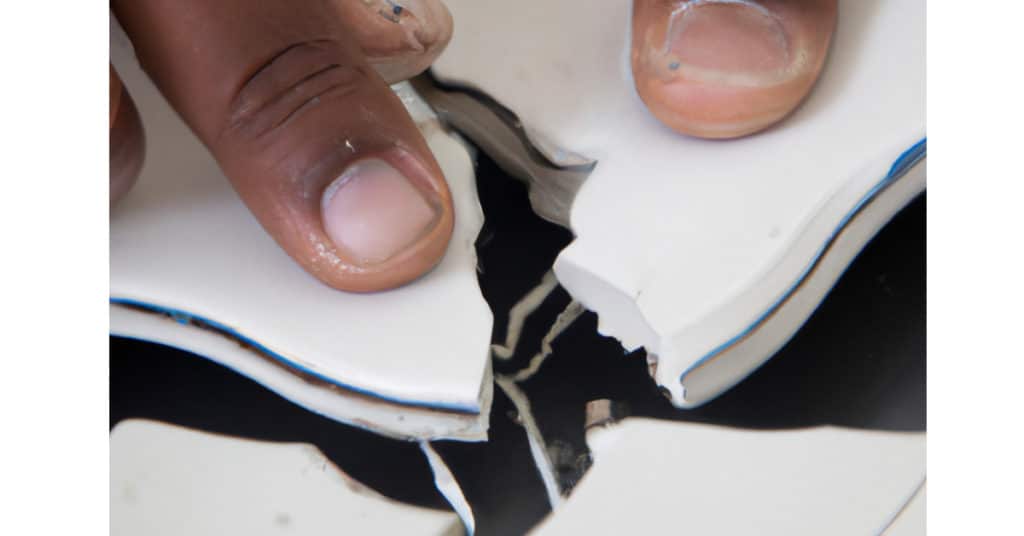
You can glue ceramic pieces back together, but it’s not always a perfect fix. If the break is clean, you have a better chance of holding glue. If the break is jagged, the glue may not keep well. You’ll also want to ensure the pieces fit snugly together before gluing.
Is Gorilla Glue good for ceramics?
Gorilla Glue is an excellent option for gluing ceramic back together. It’s a strong, durable glue that can hold up against weight and wear. Plus, it’s easy to use and dries quickly. Here’s a step-by-step guide to using Gorilla Glue on ceramics:
- Start by cleaning the broken pieces of ceramic. Please make sure they’re free of dirt and debris before you start gluing.
- Next, apply Gorilla Glue to one of the broken pieces. Apply it evenly along the edge of the piece.
- Place the other broken piece on top of the first piece, aligning the edges.
- Press firmly on the glued area until the two pieces are tightly secured.
- Let the glue dry completely according to package instructions (typically 24 hours).
- Once dried, fill in any gaps with additional Gorilla Glue or superglue (if needed).
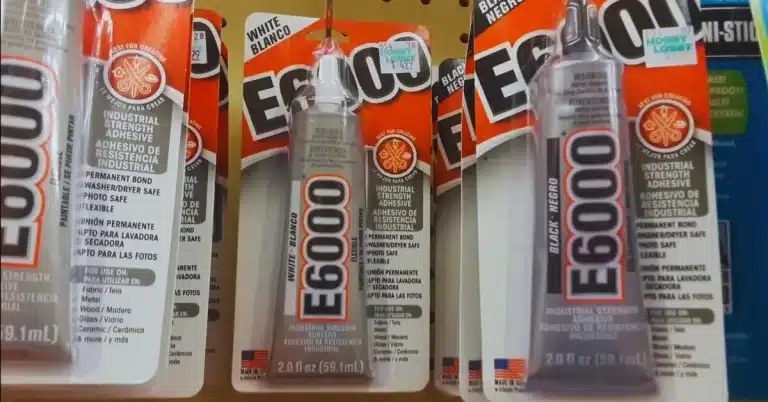
Is E6000 glue good for ceramics?
E6000 glue is a good option for gluing ceramic back together. This type of glue is very strong and can withstand high temperatures. Plus, it is clear when dry, so it will not discolor your ceramic piece. Here’s a step-by-step guide to using E6000 glue to fix your ceramic:
- Start by cleaning both surfaces that you will be bonding. E6000 works best on clean surfaces.
- Next, apply the glue to one surface. You can use a toothpick or other sharp object to help apply a thin layer of glue.
- Press the two surfaces together and hold for 30 seconds.
- Wipe away any excess glue with a damp cloth.
Does Loctite work on ceramic?
Loctite is a great product for gluing ceramic together. It is a two-part epoxy that sets in just four minutes and can be used on various surfaces, including ceramic. Plus, it is water resistant and can be used indoors or outdoors. To use Loctite, first, clean the surface of the ceramic with alcohol. Then, mix equal epoxy parts and apply them to one surface. Next, press the two surfaces together and hold for four minutes. Finally, allow the glue to set for 24 hours before using the ceramic piece.
Last Opinion
While super glue is the easiest way to fix a broken ceramic piece, it’s not always the best option. If you’re looking for a more permanent fix, epoxy is the way.
Just follow the instructions carefully and give yourself plenty of time to work – rushing will only worsen things. With patience and care, you can have your ceramic piece looking good as new in no time.