What’s the best adhesive for iron balusters? This question frequently arises when homeowners decide to replace their iron balusters, but the answer isn’t always as simple as using strong and durable glue.
In fact, different glues will offer better performance depending on how you plan to use your new iron balusters and which baluster style you choose, so it’s essential to consider all of your options before making your decision.
Read More: Best Adhesive For Stair Treads
What Epoxy to Use for Iron Balusters?
1) EPC-410 Epoxy Tubes Adhesive for Iron Baluster
2) PC Products PC-Super Epoxy Adhesive Paste
Top 2 Best Adhesive for Iron Balusters Reviews
#1. EPC-410 Epoxy Tubes Adhesive for Iron Baluster
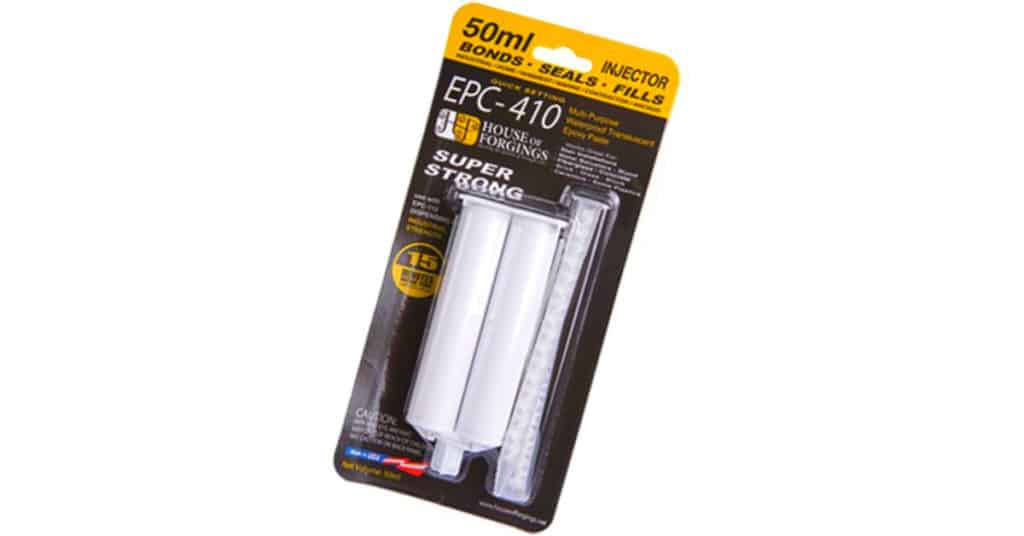
EPC-410 is a two-part epoxy resin that cures an extremely tough, durable, and chemically resistant bond. It is designed for bonding iron balusters or stair stringers to concrete, brick, or stone surfaces.
This product has been designed for beginner to professional use by contractors who need a strong adhesive with high resistance to chemicals and moisture.
It’s a two-part epoxy that you can mix with the included mixing nozzle to create a strong, durable adhesive. The product comes with detailed instructions and plenty of tips on how to fix any type of damage your baluster may have incurred.
The iron baluster adhesive can be used with the EPC-112 Epoxy Gun. This will help you glue up to 20 balusters with only one adhesive tube (1 pound). If you have applied for more than 20 balusters, I suggest buying more than one tube.
This epoxy dries clear and non-drip, giving it an edge over other epoxies on the market. The high-performance epoxy adhesive can be used to glue metal balusters into wood floors and wood rails.
PROS:
- It is a two-part epoxy, which makes it stronger than other adhesives.
- The mixing nozzle makes it easy to mix the two parts together.
- It dries clear, so it won’t be visible once the balusters are installed.
- It is non-drip, so there won’t be any mess.
- Cost-effective.
CONS:
- N/a.
#2. PC Products PC-Super Epoxy Adhesive Paste
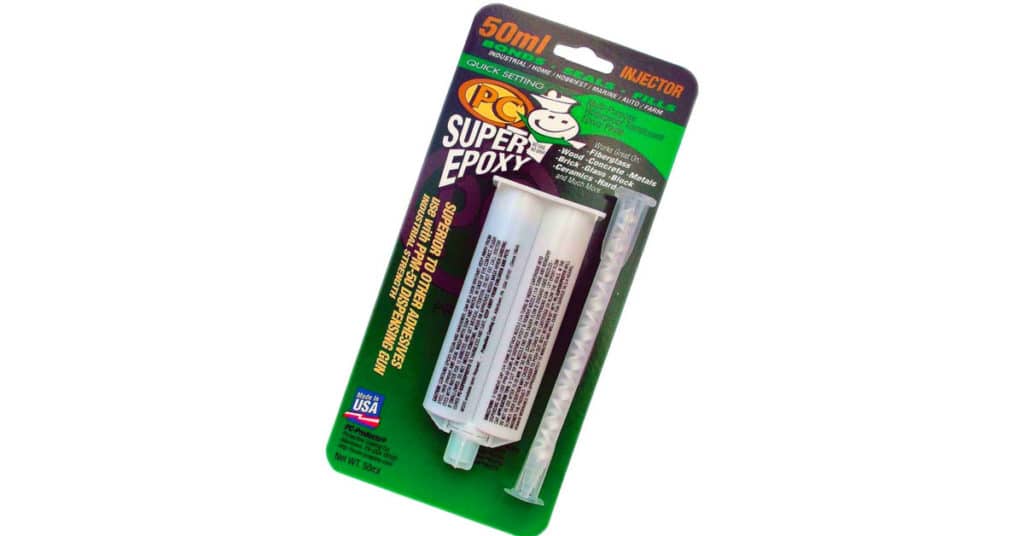
PC Products PC-Super Epoxy Adhesive Paste is a two-part epoxy that creates strong bonds between various materials, including fiberglass, wood, metal, thin brick, or concrete. This product is perfect for DIY projects or professional use.
The adhesive can withstand high temperatures and comes in various colors to match any project. The translucent material cures to blend in with the bonded material.
It has a work time of 15 minutes, the cure time for service is 3 to 4 hours, and the full cure time is 3 to 7 days.
Overall, the most popular iron balusters adhesive has high strength and durability, making it perfect for bonding materials of all kinds. This product is easy to apply and can be used on many surfaces.
PROS:
- Bonds and seals a variety of materials.
- Withstands extreme temperatures.
- Short work time.
- It can be machined after cure.
CONS:
- Long cure time.
Steps to Choosing the Right Epoxy for Iron Balusters
1. Know the application
Epoxy comes in two forms; A fast-curing adhesive that can be used for quick fixes like cracks or repairs, and one that cures more slowly to form a strong, long-lasting bond. Find out which is right for your project to prevent problems down the line when it’s too late to fix them.
2. Consult with your hardware store or contractor
If you’re unsure which epoxy is best for your project, consult with someone who knows. They can help you find the right product and give you tips on getting it up there safely without making a mess of things.
3. Check compatibility issues
Epoxies are made from different chemical compounds, so ensure that yours will work with any other materials you plan on using before mixing them!
Some epoxies have a thinning agent added, and others don’t. There are some incompatibilities you should watch out for, including stainless steel and aluminum (don’t mix!), fiberglass (can corrode), and marble (can bleed through).
Certain types of epoxy can react chemically to metals, such as copper and brass. Depending on what type of metal you’re using in your project, use the corresponding type of epoxy to avoid a negative reaction.
Copper isn’t compatible with most epoxies so if you need something strong for copper, look for an epoxy designed explicitly for copper or bronze metals.
Brass also reacts negatively with many adhesives, so if that’s the material you’re working with, try an adhesive specially designed for brass instead.
4. Make sure you’ve got enough
With epoxy, less is definitely not more. You want enough to cover every surface evenly but not too much so that it starts dripping off the sides and creates a messy cleanup.
Make sure you’re buying enough, or ask for advice at your local hardware store about how much to buy since they’ll know their inventory better than anyone else!
How Do You Glue Iron Balusters?
Installing iron balusters involves a few more steps than installing wooden ones, but the process is still straightforward. Adhesive isn’t typically the primary method of securing iron balusters, but it can be used as a supplement to make the balusters more secure and to prevent wobbling. Here is a basic guide:
Materials:
- Iron balusters
- Epoxy adhesive or construction adhesive suitable for metal and wood
- Drill with appropriate drill bits
- Baluster shoes (optional, for aesthetic purposes)
- Tape measure
- Hacksaw or metal cutting saw
- Paint for touch-ups (optional)
Steps:
- Remove Old Balusters: If you’re replacing old balusters, start by removing them. This typically involves cutting them out with a saw and then extracting any remaining parts.
- Measure and Cut the New Baluster: Measure the length between the stair tread (or floor) and the handrail where you’ll install the new baluster. Once you have this measurement, cut the new baluster to fit. If you’re using baluster shoes, remember to account for them in your measurements.
- Drill Holes: Drill holes in the stair tread (or floor) and in the handrail for the baluster. Make sure the hole’s size corresponds to the diameter of the baluster end.
- Apply Adhesive: Apply the epoxy adhesive or construction adhesive to both the top and bottom ends of the baluster. Be sure to use an adhesive that’s suitable for both metal and wood.
- Install the Baluster: Insert the baluster into the hole in the stair tread (or floor). Align it with the hole in the handrail and push it up into that hole. Ensure it’s straight and aligned properly. You can wipe away any excess adhesive with a damp cloth.
- Let It Dry: Allow the adhesive to dry according to the manufacturer’s instructions. Once dry, the baluster should be secure.
- Finish Up: If you’re using baluster shoes, slide them into place and secure them with a little adhesive if necessary. If the baluster needed cutting and the cut is visible, consider doing some touch-up painting.
Safety reminder: Always wear appropriate safety gear and ensure you’re working in a well-ventilated area when using adhesives. Follow the manufacturer’s instructions for both the balusters and the adhesive.
What kind of adhesive do you use for balusters?
When installing balusters (also known as spindles) in a staircase or balcony railing, you may need some form of adhesive to secure them in place, especially if they are going to be installed in a wooden structure. Here are a few types of adhesives you might use:
Wood Glue: This is an adhesive specifically designed for bonding wood pieces. It creates a strong bond that can handle the weight and tension put on balusters. A high-quality carpenter’s glue like Titebond III, which is waterproof and has excellent bonding strength, could be a good choice.
Epoxy Resin: This two-part adhesive forms an extremely strong and durable bond. It is typically used for heavy-duty applications, including those involving different materials.
Construction Adhesive: This is a type of glue designed for attaching various construction materials. Brands like Liquid Nails or Loctite PL Premium have products that can bond wood, metal, and other common baluster materials. It is generally very strong and has good resistance to environmental conditions.
It’s important to note that while adhesive can help reinforce the balusters, it is often not the primary attachment method. Balusters are usually secured with nails or screws, and the adhesive is used to eliminate any wobble or movement, giving the baluster a more secure fit.
Always check the manufacturer’s guidelines and recommendations when choosing and applying adhesive. The suitability of an adhesive can depend on the specific materials you are working with, the environmental conditions, and safety regulations. Always ensure that the work area is well-ventilated when using these products.
Last Opinion
I have spent a lot of time considering the best adhesive for iron balusters, and I have concluded that EPC-410 Epoxy is your best bet. It’s specifically designed for metal surfaces, making it perfect for working with iron balusters.
It will dry clear, so you don’t need to worry about having unsightly residue on your beautiful new railing system. It also has excellent adhesion and durability, so it won’t wash away in the rain or break down in sunlight like other less quality products.
So, the answer is EPC-410 Epoxy if you want to get a strong, long-lasting hold with iron balusters.